Friday, December 25, 2015

Oozie Installation and execution of sample map-reduce program using oozie

OOZIE Installation using tarball 


Below tutorial shows the installation process of OOZIE version 2.3.2.
We also require a ZIP file ext-2.2.zip.
You can download OOZIE tarball from cloudera website.

Kindly follow below steps to install OOZIE on Ubuntu OS.

1. On Command prompt, go to Hadoop Installation directory ( in my case : /user/lib)
2. Create the folder for OOZIE (root@ubuntu:/usr/lib#mkdir OOZIE)
3. Copy both ext-2.2.zip and oozie-2.3.2-cdh3u6.tar.gz into OOZIE folder.
4. Untar the oozie-2.3.2-cdh3u6.tar.gz file.

root@ubuntu:/usr/lib/OOZIE#tar -xzvf oozie-2.3.2-cdh3u6.tar.gz

5. This will create the oozie-2.3.2-cdh3u6 folder as below.


Note: I have used the user as root. We can perform the same operations for other users as well.
  • Change ownership of the OOZIE installation to root:root.
root@ubuntu:/usr/lib/OOZIE#sudo chown -R root:root ./oozie-2.3.2-cdh3u6

Start the oozie, to check if the installation has done properly.


  • Add ext-2.2.zip file to Oozie for user root through this command.


  • Update the core-site.xml with below values, for root.


NoteHadoop version before 1.1.0 doesn't support wildcard so you have to explicitly specified the hosts and the groups. <property>
<name>hadoop.proxyuser.root.hosts</name>
<value>localhost</value>
</property>
<property>
<name>hadoop.proxyuser.root.groups</name>
<value>root,hduser,etc.</value>
</property>

Note: After making changes to core-site.xml, restart hadoop without fail, using stop-all.sh and then start-all.sh commands.

OOZIE installation/setup completed.


Sample Map-Reduce program using OOZIE workflow

Along with the installation of oozie, we have got oozie-examples.tar.gz in oozie-2.3.2-cdh3u6 folder. This folder contains the sample program for Map-Reduce, Pig, etc.. We will use the program in map-reduce folder for our demo.
  • Untar the gz file. This will create the examples folder in oozie-2.3.2-cdh3u6 folder.
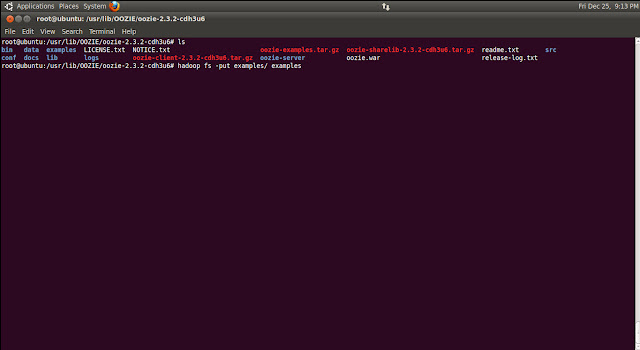
  • Copy the examples folder in HDFS.

  • Check the folder structure in HDFS as below. We are going to add these paths in workflow.xml.


  • Now go to examples folder in /usr/lib/OOZIE/oozie-2.3.2-cdh3u6/examples/apps/map-reduce and open job.properties and set the values as below.


  • Open workflow.xml file.


Go through this file and reconfirm if the values are set properly


  • Now start the oozie using below command.


  • Run the oozie command as below. If command is successful, job will be created.


  • Go to Oozie web console. Initially Status of the job will be shown as RUNNING. Once job completed successfully, Status will changed to SUCCEEDED.


  • Check the output in output-data folder.


Sunday, December 20, 2015

Populating XML Data into Hive External tables


Hi all,

Lets have a simple example for saving the Books XML data into Hive external tables. 

Sample file is attached at the end of the blog.

Books data is present in XML format as below.


1. Create External table to store the XML file data.


2. Create the external table to store the Books data. Columns are aligned to Books.xml tags, shown above.


Books.xml file is present at /usr/lib/hive path in LFS


1    To load this data into BooksData table, we have to make sure the data is formatted as per hive requirement.
a.      Each tag should be in same line.
b.      <?xml version="1.0"?> should not be present.
c.      As we require only books data, no need of catalog tags.
d.      Each <book></books> should be in single line.

To achieve this we will be using UNIX command as below.


In UNIX command, | is used for chaining/cascading the operation to next command.
e.g., output of cat Books.xml will be fed to sed ‘1d’. Output of sed ‘1d’ will be fed to sed ‘s|<catalog>||g’, so on.

What does each command in above UNIX command do?
  • cat Books.xml ==> Populates the file Books.xml
  • sed ‘1d’ ==> This command will delete the first line in Books.xml.
  • sed ‘s|<catalog>||g’ ==> This command will replace all the occurrences of               <catalog> tag with Empty string.
  • sed ‘s|</catalog>||g’ ==> This command will replace all the occurrences of </catalog> tag with Empty string.
  • tr ‘\n\r\t’ ‘ ‘ ==> This command will replace all the occurrence of \n, \t, \r with Empty string.
  • sed ‘s|</book>|</book>\n|g’ ==> This command will add the new line character after each </book> tag.
  • sed ‘s/^ *//;s/ *$//;s/  */ /;’ ==> This command will remove all the leading and trailing spaces in the file.
At last ‘> BooksFormatted.xml’ will save the final output as below.


Load the data from BooksFormatted.xml into XMLData table


Insert the formatted data from xmldata table into BooksData table.


Check the data in BooksData table.


XML Data saved into Hive external tables successfully.


Bash Script Execution for moving the XML data into Hive external tables

HiveShell.sh
 hive_path='/Hadoop/HiveExample'  
 sample_file=Books.xml  
 hive -e 'create database IF NOT EXISTS HiveExample;'  
 echo "1. Database created"  
 hive -e 'use HiveExample;'  
 hive -e "create external table IF NOT EXISTS HiveExample.BooksXML(XMLAsString String) row format delimited stored as textfile location '/Hadoop/HiveExample';"  
 echo "2. External table BooksXML created"  
 hive -e "create external table IF NOT EXISTS HiveExample.BooksDetails(BookId string, Author string, Title string, Genre string, price string, PublishedOn string, Description string) row format delimited stored as textfile location '/Hadoop/HiveExample';"  
 echo "3. External table BooksDetails created"  
 cat $sample_file | sed '1d' | sed 's|<catalog>||g' | sed 's|</catalog>||g' | tr '\n\r\t' ' ' | sed 's|</book>|</book>\n|g' | sed 's/^ *//;s/ *$//;s/ */ /;' > BooksHiveFormatted.xml  
 echo "4. Data from Books XML formatted as per Hive requirement"  
 hive -e "load data local inpath '/usr/lib/hive/BooksHiveFormatted.xml' overwrite into table HiveExample.BooksXML;"  
 echo "5. Data inserted from Formatted XML into BooksXML table"  
 hive -e "insert overwrite table HiveExample.BooksDetails select xpath_string(XMLAsString, 'book/@id'),xpath_string(XMLAsString, 'book/author'),xpath_string(XMLAsString, 'book/title'),xpath_string(XMLAsString, 'book/genre'),xpath_string(XMLAsString, 'book/price'),xpath_string(XMLAsString, 'book/publish_date'),xpath_string(XMLAsString, 'book/description') from HiveExample.BooksXML;"  
 echo "6. Inserted the data from BookXML table to BooksDetails table"  
 hive -e "select BookId, Author, price from HiveExample.BooksDetails;"  


Execution of the script


Books.xml is attached here.
Sample Books.xml

Wednesday, December 9, 2015

Fetching twitter data using Flume


After the flume installation, as mentioned in the other post in the blog, please follow the below steps for fetching twitter data using flume.

Setup for Twitter


Sign In, the twitter account.


Click on Create New App


Give the details as shown below

Note: Website should be fully qualified URL.
e.g., instead of google.com, should give http://www.google.com


Tick "Yes, I agree" and click Create your Twitter application.


Application will be created as below


Click on the created application and select tab Keys and Access Tokens.


Scroll down and click Create my access token.


If the access token successfully created, you will get below message as Status.


Scroll down and you will see the Access Token and Access Token Secret.


These 4 highlighted details in above 2 screenshots, we need as a part of flume configuration file(mentioned in the below screenshot).

Create OR copy the conf file into conf folder of apache flume as shown below.
Name of the conf file is user dependent. I used flume.conf in my case.


Add the details into flume.conf as below.

CosumerKey  == Consumer Key from Twitter
ConsumerSecret == Consumer Secret from Twitter
accessToken == Access Token from twitter
accessTokenSecret == Access Token Secret from twitter


Run the below command to fetch the data from twitter.


If everything goes right, we can see the below output, on HDFS location, mentioned in the flume.conf file.


Error Rectifications

While executive the Flume command, user may get the following error

Error says that Ensure that you have set the valid consumer key/secret, access token/secret and system clock is in sync.


Resolution 1: First of all, check the access key/secret and access tokens/secret are correct as per twitter values.

Resolution 2: There may be a chance that the Host OS and the guest OS has difference in timezone,
e.g., My Host OS Windows 8 has time set as per India (IST) and Guest OS has US time zone.

To resolve the timezone problem, do the following.

From root user login
Stop ntp service
$ service ntp stop => This will stop the ntp service
$ ntpdate ntp.ubuntu.com => This will update the Guest OS time same as Host OS
$ service ntp start => This will start the ntp service


Re-execute the Flume command...

Saturday, December 5, 2015

Step by step Flume installation


Flume installation


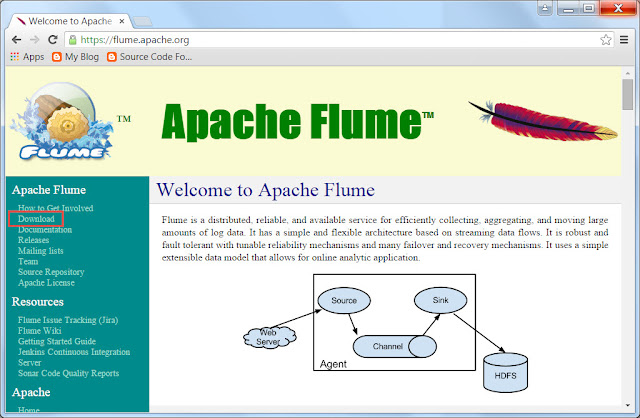
1. Open google.com and search Apache Flume.
You will find the https://flume.apache.org website as the first option only.


Click on the URL, Apache Flume website will be launched. 
Click on the Download button on the left side.


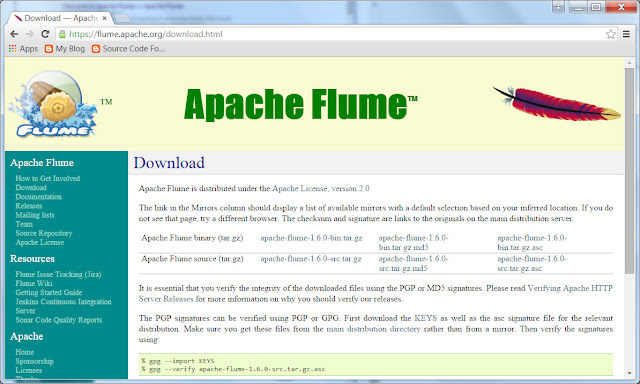
You will find the latest apache flume tz file(which is a zipped file). 
Latest version of apache flume available is 1.6.


If you need older tz files of flume, go to archive repository
You will see the below list of folders containing older versions.


Click on any of the required older versions(e.g., 1.4.0) and click
on the apache-flume,1.4.0-bin.tar.gz file.


For complete execution of the Flume use case, we require
  • the tar file(downloaded above)
  • flume-sources-1.0-SNAPSHOT.jar
  • twitter4j-4.0.4.jar files
  • conf file for setup(more details in below section)
For this usecase, I have used the apache-flume-1.4.0.tar.gz file.

STEP BY STEP installation process on VM Machine
(Please execute the command as mentioned in the screenshots)

  1. On VM Machine, open the command terminal.
  2. Go to /usr/lib directory. We can use any folder to install the component. Generally the folder, where most of the components are installed should be selected. In my case /usr/lib is the folder where other components are installed.
  3. Create flume directory 


Go to flume directory


Copy the tar file into the flume folder


Untar the tar.gz file 


Copy the twitter4j-4.0.4.zip into lib folder of apache flume folder.


Unzip the twitter4j-4.0.4.zip file


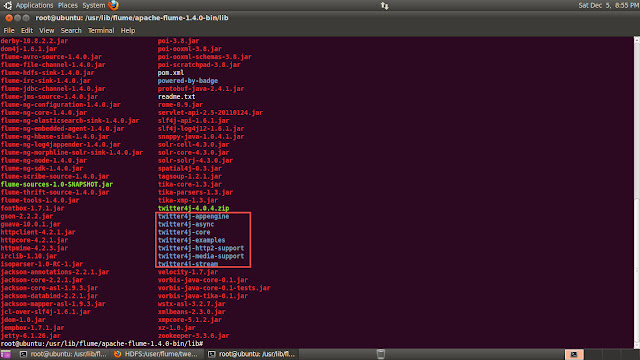
check if the twitter4j files are available in lib folder of apache flume.


After performing untar and unzip operation, 
  • Copy flume-sources-1.0-SNAPSHOT.jar into lib folder. 
Note: The file can directly be placed in lib folder from the LFS.
           Here I copied the file from LFS to bin folder and then moved into lib folder.
  • Create the flume-env.sh file in conf folder.


Open the flume-env.sh and add the flume-sources-1.0-SNAPSHOT.jar file path into FLUME_CLASSPATH


Installation completed......