Below tutorial shows the installation process of OOZIE version 2.3.2.
We also require a ZIP file ext-2.2.zip.
You can download OOZIE tarball from cloudera website.
Kindly follow below steps to install OOZIE on Ubuntu OS.
1. On Command prompt, go to Hadoop Installation directory ( in my case : /user/lib)
2. Create the folder for OOZIE (root@ubuntu:/usr/lib#mkdir OOZIE)
3. Copy both ext-2.2.zip and oozie-2.3.2-cdh3u6.tar.gz into OOZIE folder.
4. Untar the oozie-2.3.2-cdh3u6.tar.gz file.
root@ubuntu:/usr/lib/OOZIE#tar -xzvf oozie-2.3.2-cdh3u6.tar.gz
Note: I have used the user as root. We can perform the same operations for other users as well.
- Change ownership of the OOZIE installation to root:root.
Start the oozie, to check if the installation has done properly.
- Open Browser, and open http://localhost:11000/oozie. OOZIE web console will launch as below.
- Add ext-2.2.zip file to Oozie for user root through this command.
- Update the core-site.xml with below values, for root.
Note: Hadoop version before 1.1.0 doesn't support wildcard so you have to explicitly specified the hosts and the groups. <property>
<name>hadoop.proxyuser.root.hosts</name>
<value>localhost</value>
</property>
<property>
<name>hadoop.proxyuser.root.groups</name>
<value>root,hduser,etc.</value>
</property>
<name>hadoop.proxyuser.root.hosts</name>
<value>localhost</value>
</property>
<property>
<name>hadoop.proxyuser.root.groups</name>
<value>root,hduser,etc.</value>
</property>
Note: After making changes to core-site.xml, restart hadoop without fail, using stop-all.sh and then start-all.sh commands.
Along with the installation of oozie, we have got oozie-examples.tar.gz in oozie-2.3.2-cdh3u6 folder. This folder contains the sample program for Map-Reduce, Pig, etc.. We will use the program in map-reduce folder for our demo.
- Untar the gz file. This will create the examples folder in oozie-2.3.2-cdh3u6 folder.
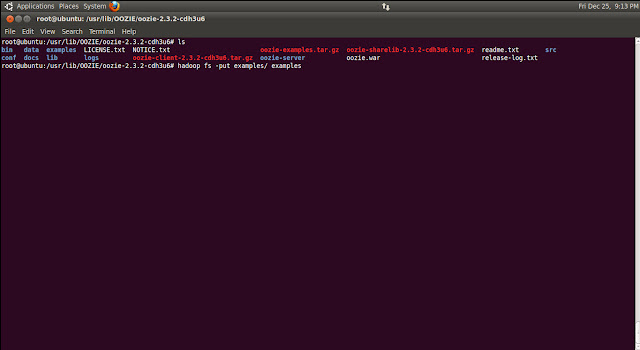
- Copy the examples folder in HDFS.

- Check the folder structure in HDFS as below. We are going to add these paths in workflow.xml.

- Now go to examples folder in /usr/lib/OOZIE/oozie-2.3.2-cdh3u6/examples/apps/map-reduce and open job.properties and set the values as below.
- Open workflow.xml file.
Go through this file and reconfirm if the values are set properly
- Now start the oozie using below command.
- Run the oozie command as below. If command is successful, job will be created.
- Go to Oozie web console. Initially Status of the job will be shown as RUNNING. Once job completed successfully, Status will changed to SUCCEEDED.
- Check the output in output-data folder.


very good, self descriptive....
ReplyDeleteThank you so much..!!!
DeleteIt was really a nice article and i was really impressed by reading this Big data hadoop online Training Bangalore
ReplyDelete