Flume installation
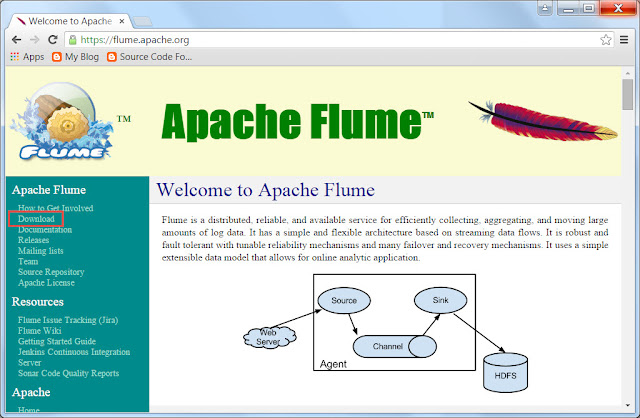
1. Open google.com and search Apache Flume.
You will find the https://flume.apache.org website as the first option only.
Click on the URL, Apache Flume website will be launched.
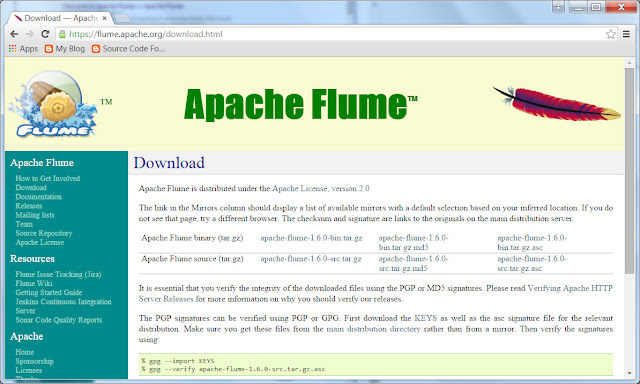
Click on the Download button on the left side.

You will find the latest apache flume tz file(which is a zipped file).
Latest version of apache flume available is 1.6.

If you need older tz files of flume, go to archive repository
You will see the below list of folders containing older versions.
Click on any of the required older versions(e.g., 1.4.0) and click
on the apache-flume,1.4.0-bin.tar.gz file.
For complete execution of the Flume use case, we require
- the tar file(downloaded above)
- flume-sources-1.0-SNAPSHOT.jar
- twitter4j-4.0.4.jar files
- conf file for setup(more details in below section)
For this usecase, I have used the apache-flume-1.4.0.tar.gz file.
STEP BY STEP installation process on VM Machine
(Please execute the command as mentioned in the screenshots)
(Please execute the command as mentioned in the screenshots)
- On VM Machine, open the command terminal.
- Go to /usr/lib directory. We can use any folder to install the component. Generally the folder, where most of the components are installed should be selected. In my case /usr/lib is the folder where other components are installed.
- Create flume directory
Go to flume directory
Copy the tar file into the flume folder
Untar the tar.gz file
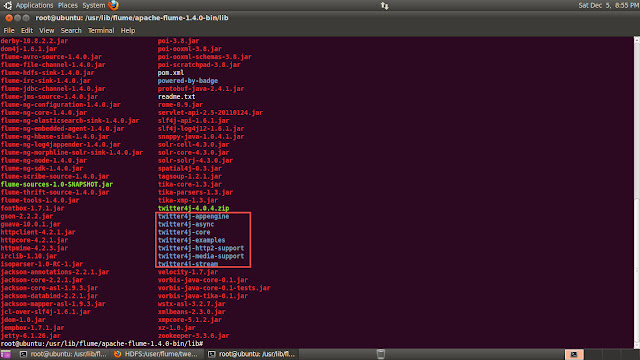
Copy the twitter4j-4.0.4.zip into lib folder of apache flume folder.
check if the twitter4j files are available in lib folder of apache flume.

After performing untar and unzip operation,
- Copy flume-sources-1.0-SNAPSHOT.jar into lib folder.
Note: The file can directly be placed in lib folder from the LFS.
Here I copied the file from LFS to bin folder and then moved into lib folder.
- Create the flume-env.sh file in conf folder.
Open the flume-env.sh and add the flume-sources-1.0-SNAPSHOT.jar file path into FLUME_CLASSPATH
Installation completed......


Excellent article.. thanks a lot for sharing this installation procedure to us and after reading this article i am very clear in this topic..
ReplyDeletehadoop training center in chennai
Interesting article to read.. All information having clear explanation so easy to understand..
ReplyDeletehadoop training | big data training